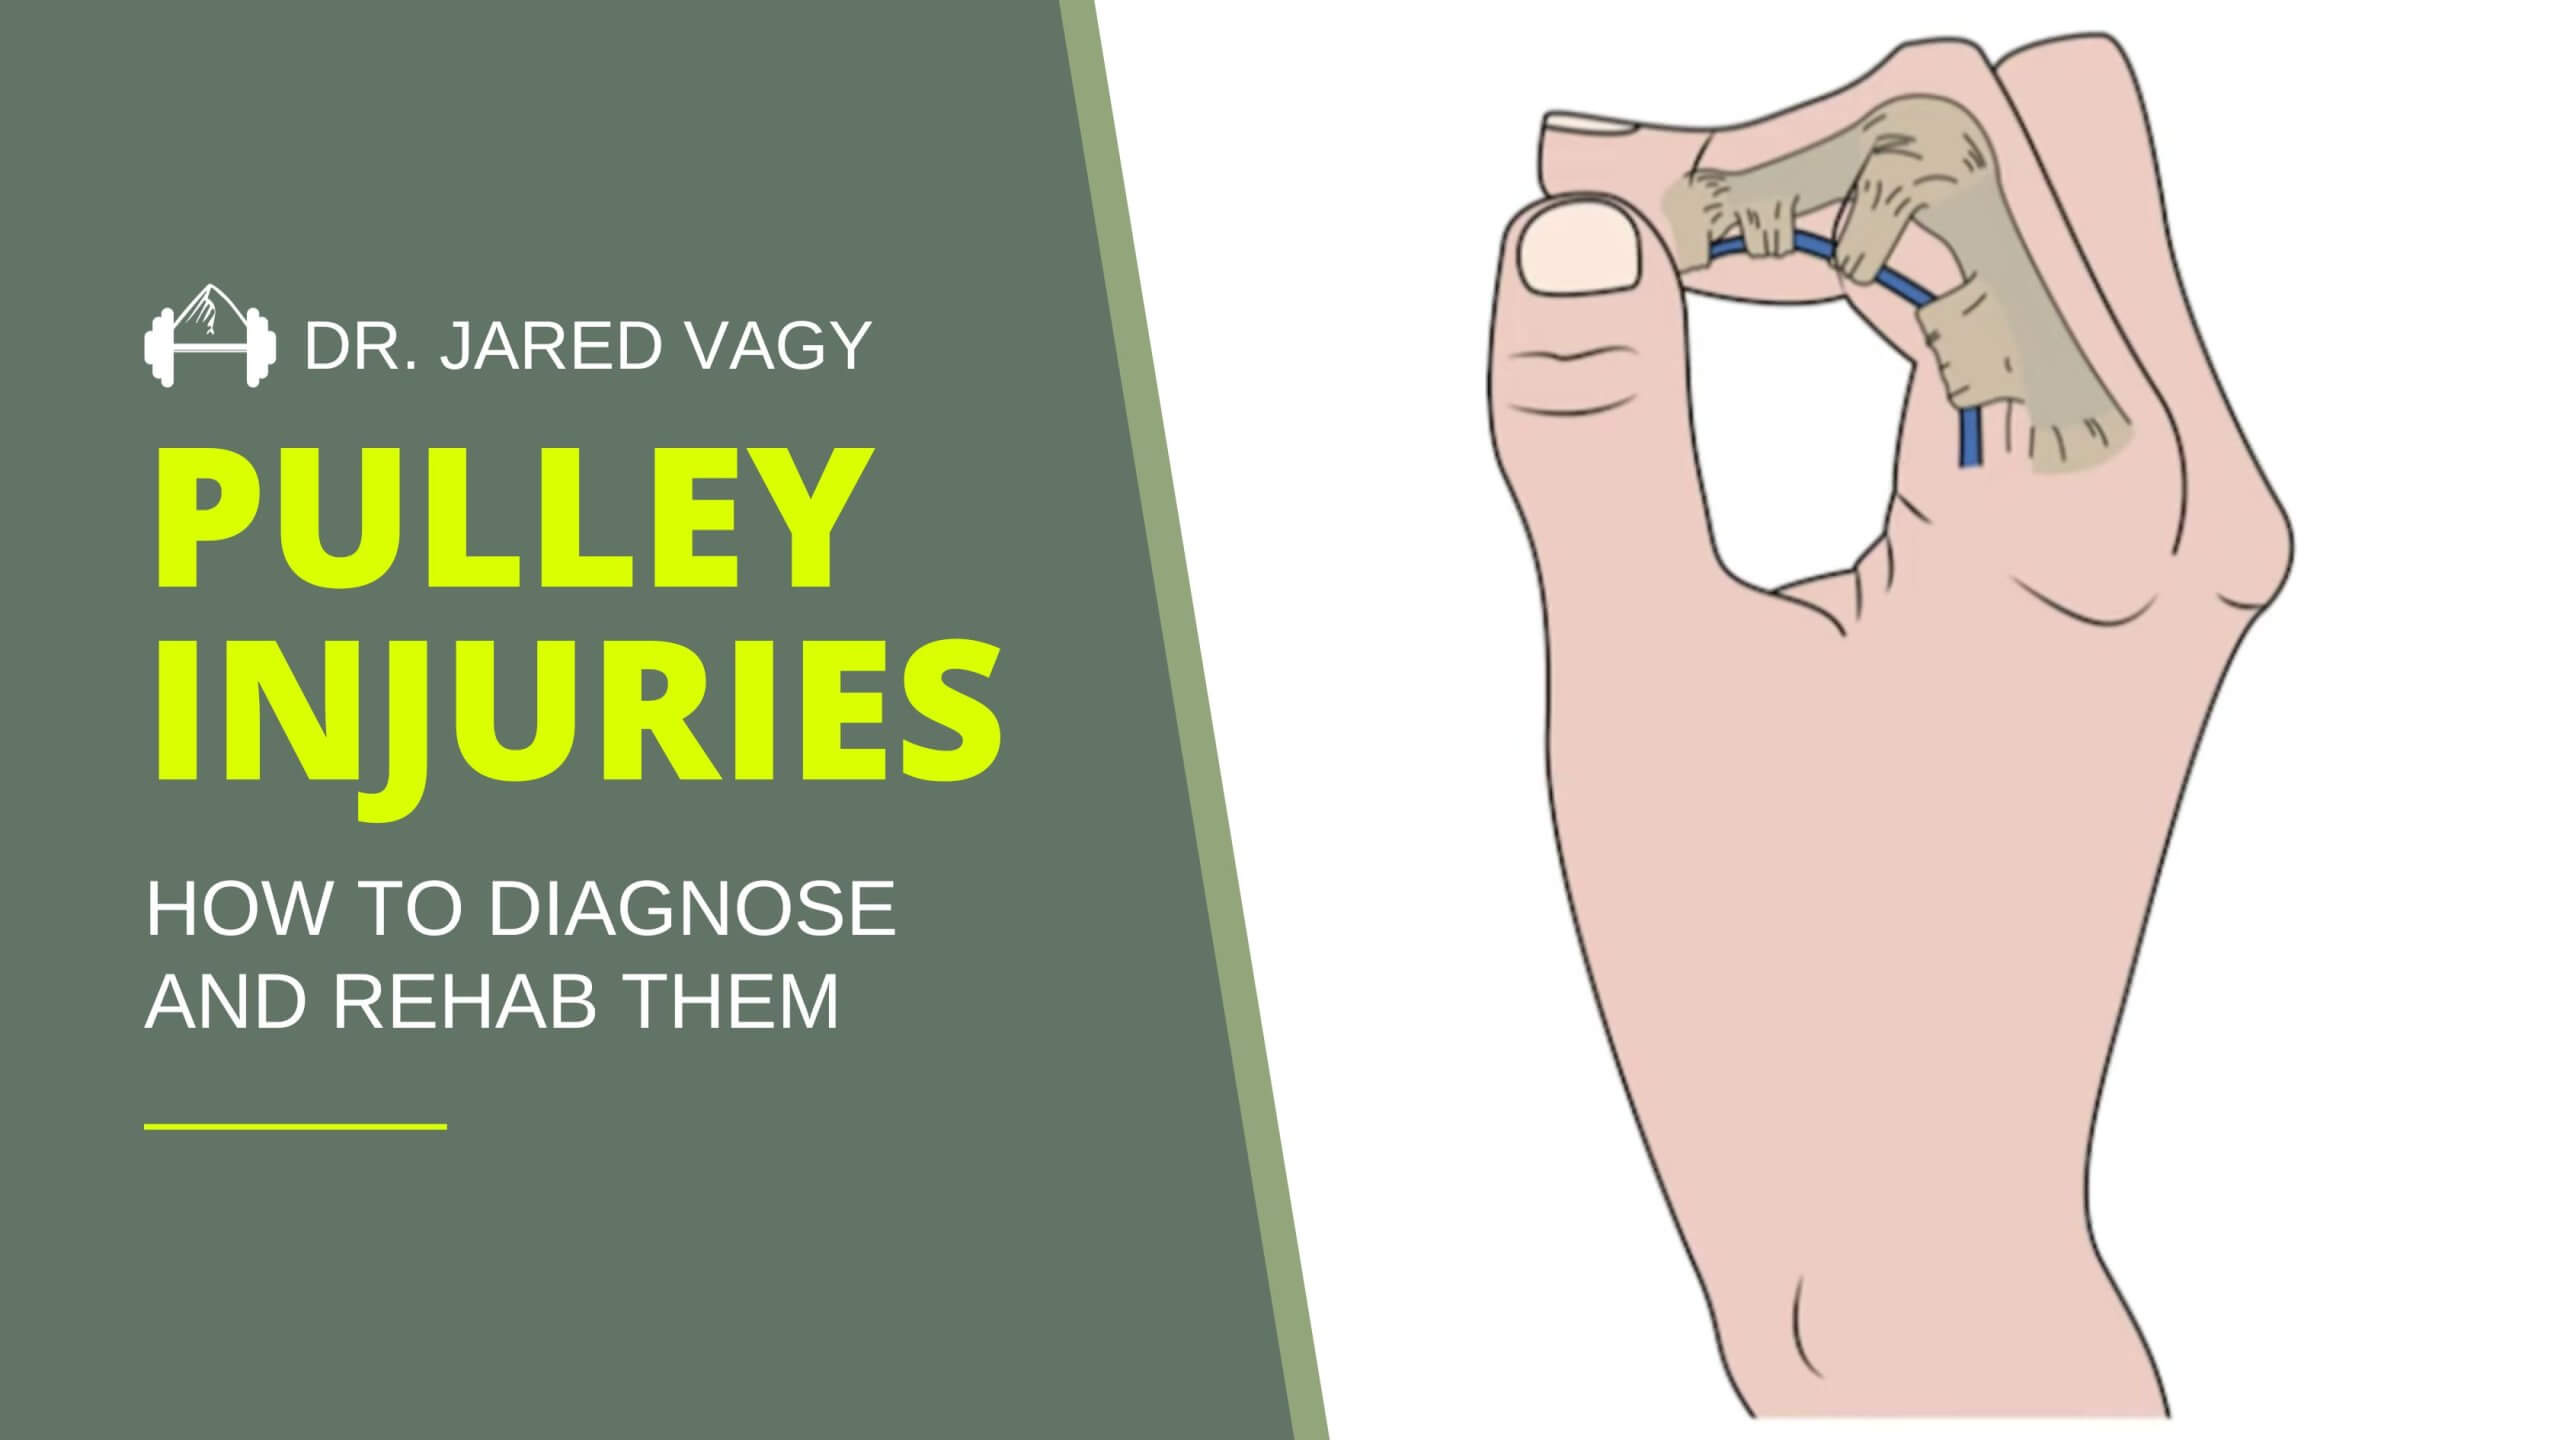
How to Diagnose and Rehab a Finger Pulley Injury
A pulley injury is the most common injury in rock climbers, accounting for over 40% percent of all climbing injuries. You know the feeling exactly when it happens. Maybe you are tired and are crimping down on a crux move. You try one last go on your project and then…you hear the dreaded pop. But lucky for you, there’s a straightforward way to diagnose, classify, and start a rehabilitation program with research-based timelines. In the article below, I’ll be taking you step-by-step through the process.
What is a finger pulley and why is it important for climbing?
Watch the video below to learn more about the anatomy, biomechanics, and research related to pulley injuries. This will give you a strong foundation of understanding so that you can determine the correct path to rehabilitate the injury.
Diagnosis
One of the most important steps after a pulley injury is to have it properly diagnosed. There are two ways to go about this. If you have access to a practitioner who uses diagnostic ultrasound, they can grade the injury based on the degree of tendon bowstring – which is the distance of the pulley tendon from the bone.
Lutter and colleagues have revised the criteria to grade pulley injuries based on diagnostic ultrasound. As you can see in the table below, pulley injuries are graded, based on ultrasound evidence, as Grade I, II, III, IVa, or IVb.
| Grade I | Grade II | Grade III | Grade IV a/b |
|---|---|---|---|
| Stretching or Slight Tearing | A3 or A4 Complete Rupture A2 Partial Tear | A2 Complete Rupture | Multiple Complete Ruptures |
If you do not have access to diagnostic ultrasound, not to worry. Cooper and colleagues have developed a clinical criterion that you, or a medical provider can use, to grade the severity of a pulley injury. This includes how much pain you have during the day, pain while climbing, range of motion, strength, and pressure sensitivity.
This criterion allows you to clinically grade the injury as mild, moderate, or severe. You can see the criteria in the table below:
| Mild | Moderate | Severe |
|---|---|---|
| Daily Living: 0/10 does not limit activity
Climbing: ≤ 2/10 after climbing only crimp grip is painful |
Daily Living: 3-5/10 does not limit activity
Climbing: ≥ 5/10 that limits climbing in all grip positions |
Daily Living: 5/10 limits activity
Climbing: > 5/10 that severely limits climbing |
| Pain at end range finger flexion with no AROM loss | Pain at end range finger flexion with ≤ 25% AROM loss | Pain and >50% limited ROM with finger bending and straightening |
| Sloper: 0/10
Half crimp: ≤ 2/10 Full crimp: ≤ 2/10 |
Sloper: ≤ 2/10
Half crimp: 2-5/10 Full crimp: 6-8/10 |
Pain and weakness with any resisted flexor muscle test or “grip” hand position |
|
Minimal pain with full blanching palpation (maximal pressure) |
Pain with mild blanching palpation (moderate pressure) | Pain with no blanching palpation (minimal pressure) |
Just to note, an ultrasound assessment is the gold standard for grading and diagnosing pulley injuries. However, not many medical providers have access to or the knowledge to perform diagnostic ultrasound to grade the injury. This will likely change over time, as we are developing courses and information to teach medical providers how to use diagnostic ultrasound properly.
So if you do not have access to diagnostic ultrasound, feel free to use the clinical criterion. Just know that there hasn’t been any research to correlate the clinical severity of the injury to tendon-bone distance from an ultrasound assessments. See below for a video that describes the differences between diagnosing the degree of injury with ultrasound and the severity with a clinical criterion.

Once you have identified the timeline, you can then follow a progressive framework to return back to full health. To do this, you can follow the rock rehab pyramid from the book “Climb Injury-Free.”

This pyramid takes you through the four phases of rehabilitating a pulley injury: unloading the tissues, increasing mobility, improving strength, and returning back to climbing movement. Watch the video below, to learn how to utilize the rock rehab pyramid to rehabilitate your pulley injury.
Happy sending!
Hopefully this article will help you understand how to diagnose and classify a pulley injury. Once diagnosed you can use the timelines to know when to load the finger and when to return to climbing based on the most current available research. You can then use the Rock Rehab Pyramid as a framework to rehabilitate your finger injury. It is always recommended that you see a medical provider to help guide you through the process.
References
-
Schöffl, V., Popp, D., Küpper, T. and Schöffl, I. (2015). Injury Trends in Rock Climbers: Evaluation of a Case Series of 911 Injuries Between 2009 and 2012. Wilderness & Environmental Medicine, 26(1), pp.62-67.
-
Lutter, C., Tischer, T., & Schöffl, V. R. (2021). Olympic competition climbing: the beginning of a new era—a narrative review. British Journal of Sports Medicine, 55(15), 857-864.
- Cooper, C., & LaStayo, P. (2019). A potential classification schema and management approach for individuals with A2 flexor pulley strain. Journal of hand therapy: official journal of the American Society of Hand Therapists.
- Schneeberger, M., & Schweizer, A. (2016). Pulley ruptures in rock climbers: outcome of conservative treatment with the pulley-protection splint—a series of 47 cases. Wilderness & environmental medicine, 27(2), 211-218.
- Schweizer A. Biomechanical properties of the crimp grip position in rock climbers. J Biomech. 2001;34:217-223.
- Roloff, I., Schöffl, V. R., Vigouroux, L., & Quaine, F. (2006). Biomechanical model for the determination of the forces acting on the finger pulley system. Journal of biomechanics, 39(5), 915-923.
- Schweizer A. Biomechanical properties of the crimp grip position in rock climbers. J Biomech. 2001;34(2):217–23
- Doyle JR. Palmar and digital flexor tendon pulleys. Clin Orthop Relat Res. 2001;383:84–96.
- Chow JC, Sensinger J, McNeal D, Chow B, Amirouche F, Gonzalez M. Importance of proximal A2 and A4 pulleys to maintaining kinematics in the hand: a biomechanical study. Hand (NY). 2014;9(1):105–11.
- Schweizer A. Biomechanical properties of the crimp grip position in rock climbers. J Biomech. 2001;34(2):217–23.
- Vigouroux, L., Quaine, F., Labarre-Vila, A., & Moutet, F. (2006). Estimation of finger muscle tendon tensions and pulley forces during specific sport-climbing grip techniques. Journal of biomechanics, 39(14), 2583-2592.
- Vigouroux, L., Quaine, F., Paclet, F., Colloud, F., & Moutet, F. (2008). Middle and ring fingers are more exposed to pulley rupture than index and little during sport-climbing: a biomechanical explanation. Clinical biomechanics, 23(5), 562-570.
Take the Next Step
If you’re interested in following a research-based rehabilitation protocol for your pulley injury, there’s one available on the trainingbeta site. More information below:

This “Rock Rehab Protocol” is designed to take you step-by-step through the entire rehabilitation process of a pulley injury
- Diagnose your injury with orthopedic tests
- Choose a rehab category based on your test results
- Follow the specific protocol for your rehab category
- Return to climbing at full strength and injury-free
About The Author

Jared Vagy is a doctor of physical therapy who specializes in treating climbing injuries. He is the author of the Amazon #1 best-seller “Climb Injury-Free,” teaches Climbing Injury Professional Education for Medical Providers, and is the developer of the Rock Rehab Protocols. He has published numerous articles on injury prevention and lectures internationally. Dr. Vagy is on the teaching faculty at the University of Southern California, one of the top doctor of physical therapy programs in the USA. He is a board-certified orthopedic clinical specialist. He is passionate about climbing and enjoys working with climbers of all ability levels, ranging from novice climbers to the top professional climbers in the world.
For more education, check out the Instagram page @theclimbingdoctor
this is incredibly useful content! Thank you <3